Wednesday, May 11, 2011

Introductory Video

This is my project's introductory video :


Presentation Seminar

This is my slides for Playground 5 presentation seminar session. :)
View more presentations from Cik Meow

Installation Manual

[Online]

  1. Connect to internet
  2. Open your web browser
  3. Log on to http://www.mytweetface.net/
  4. Click on “Let’s cam-whore” button to start the application. Further instructions are there.
  5. Enjoy and share your photo with the world.

[Offline]

  1. Setup your localhost server.
  2. You can install WampServer using the installer provided. Else, you may use any other localhost server that you have in your system.
  3. If you are using WampServer, open directory “C:\wamp\www”
  4. Copy both folders from “02- Working Files” into “C:\wamp\www” directory.
  5. Open your web browser to run the application.
  6. Log on to
  7. i - http://localhost/tweet/index.html to run my first version of the application (ActionScript)
  8. ii- http://localhost/fyp/index.html to run my second version of the application (CSS/HTML)
  9. Enjoy and share your photo with the world.

Synopsis

This project is an online based application, hosted at http://www.mytweetface.net/; enabling users ease to access the application at their own convenient time. I was inspired to do this project by reviewing on the current issue in the society on cam-whoring and also social networking.

Cam-whoring is fast becoming a pandemic issue all over the world; the definition of Cam-whoring could be different base on geographic regions and cultures. In Malaysia where the culture is more conservative, someone who Cam-whores are refer to individuals who post pictures or videos of themselves on the Internet to gain attention. The term disparages those who post pictures of themselves at inappropriate times or places, and usually implies self-absorption. Other than that, people who enjoy Cam-whoring usually like to seek attentions and will use online social networking services such as Facebook, MySpace and Friendster as their medium.

Social Networking is fast becoming a day to day activity in our daily life base on the current trend of Information Communication Technology (ICT). According to a research, the most popular social networking site is Facebook.com with 250 million users and over 10 billion photos shared globally. The photo sharing feature has become the main attraction of online social networking services and proved by the statistics of 3 billion photos being uploaded every month on Facebook.

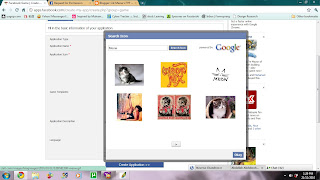
As for the design structure of the application, users need to click on the “START” button on main page to start using the application. Then, a screen with an image which is captured by the individual’s webcam will be shown and they can click on the image to change the effect, when they are happy with the desired outcome, they can capture the image and continue with the next step.

In the next stage, the image that has been captured will be loaded, so that the user can edit the value of the brightness, hue, saturation, contrast, alpha and also the threshold. In this stage, they just need to put in the value in the box provided and proceed if they are satisfied with the result.

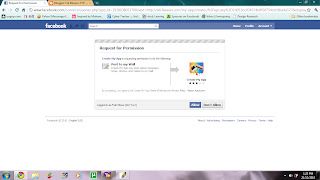
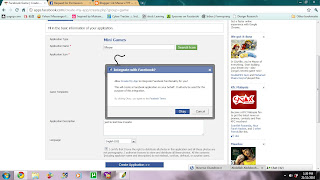
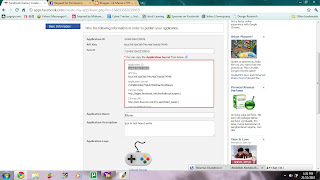
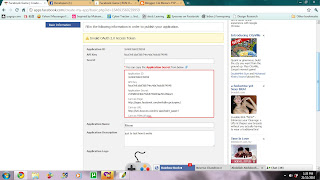
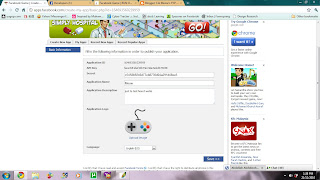
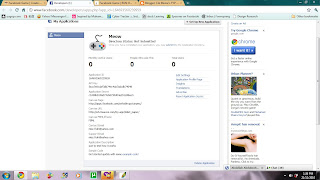
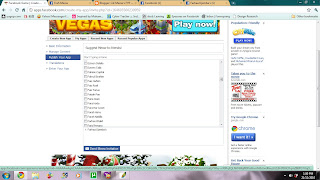
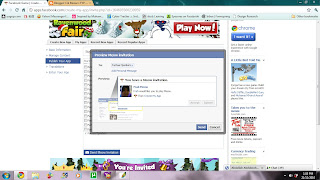
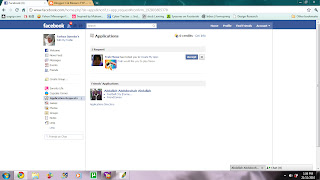
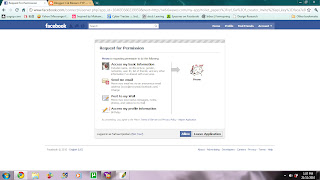
At the final stage, users need to choose the channel that they want to share their image with others. There are two channels provided; Email and Facebook, the email will be sent using the function of PHP Post via GMail SMTP Server, while to share on Facebook.com, users will be directed to Facebook connect function to link their image to Facebook.

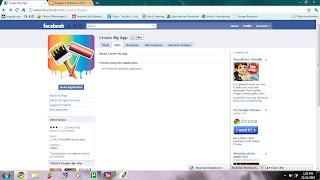
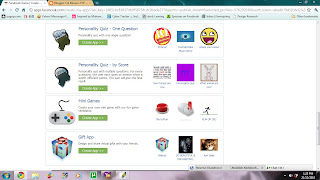
In the future, the enhancement that will take place is an upgrade of this application into a Facebook Application. By combining these two main aspects of social networking and cam-whoring, there is tendency that this application will attract more users because it is really helpful for them to update their photos in social networking site.

Sunday, May 8, 2011

Poster

This is the poster for my final project!
[Click to enlarge]

Wednesday, May 4, 2011

Exhibition

Finally, we done with the final presentation. Even my apps got a lot of bugs, i had presenting it with full of confidence. My apps then has been chosen for Playground ver 5.0 showcase..I'll be exhibit in room DR2016..so, see u guys there!

Tuesday, May 3, 2011

Webhosting

Finally, my website is up..it is hosted at http://www.mytweetface.net...

I bought this hosting + domain domain for RM99..

the invoice

For RM99, i managed to buy gold package which is providing 1GB Diskspace and 25GB Monthly bandwidth..
the package

This hosting are using Linux OS, Centos 5.6..

So, let's come n visit my site!

Thursday, April 28, 2011

New layout for editing page!

This is my new layout for editing page.. [Click to enlarge]

I replace the old slider design with this one after i didn't managed to adjust the value of saturation, hue and contrast.

With this design, users just need to enter the value in the box provided or tick/untick the checker boxes on the side to edit their images.

This page are using ActionScript 2.0 for editing the image values.

Tuesday, April 26, 2011

Consultation

I am done with saving the image in the server by using the code of
$filename = "images/mtf_". mktime(). ".jpg";
the filename is a variable
images is the folder where the pictures will be save
mtf is the starting of file name
mktime is the time stamp use to name the file
.jpg is the file format

but the problem is how to make it fully functional in my Flash application. I managed to get the image freeze when user click on capture button. But i got the problem on how to unfreeze it when user want to retake their photo. With the help of Mr. Hafiz, i managed to unfreeze the image using this code :
public function captureImage(e:MouseEvent):void {
//snd.play();
captureon = !captureon;
if (!captureon) {
addChild(bitmap);
} else {
removeChild(bitmap);
}
bitmapData.draw(webcam);
then, when users are happy with their image and click continue, their image will be save in my server and they will continue to the next stage.

Wednesday, April 20, 2011

Save & Load

During the tutorial session in KLCC last Saturday, me with the help of my friend have build a prototype for save and load function. We managed to load the picture when we use the fixed name of the file. But after we changed the name into variable, the image can't be load anymore.

php file for saving the image according to the variable name.

This is how it will work
The image supposed to be load on the black box. I'm still trying to transfer the source code from this prototype to my application. It take time because I need to separate this code into 2 different pages

share.swf ------> email.swf

This is the simplest page in my appliication. I just need to linking this page to another .swf and another site.
To link to email page

This is the linking between these two pages.

This page will be linking to email page or Facebook site.
For Facebook, it will directed to the site.
For email, user need to fill in the requirement on that page and send it as an email.

edit.fla + edit.as = edit.swf

This is my 3rd page, editing and the image showed what i have done for this page. Click images to enlarge.

The upper code is to rename the slider and the bottom one is to edit brightness value.

The value for hue, saturation and contrast is static. I still in the process of figuring out on how to change the value constantly with the slider value.

The example of the page:
The value for saturation, hue and contrast is still not working. The slider design also has not been finalized yet.

Efek.fla and efek.as

This is the source code for my main page. Here is the explanation for the code :

This is the code for me to import the external file to this page. Some of the thing that I imported is camera and the effect on the webcam images.

This is to call camera and freeze the image on stage after user pressed the capture button.

This part is to save the image in specific format and folder.

Here is the video on how this page works :

User will pose in front of the camera and snap the picture by clicking on the red button. They will reclick on the button to re-capture the image. Click continue to go to next page after the user is satisfied with the image.

Saturday, April 16, 2011

Live Update @ KLCC

1. Arriving KLCC for PHP tutorial session. [11.17am]

2.Currently, I'm waiting for my friend to assist me in .php n server/database stuff. [12.08pm]

3. Yeay, finally they are in KLCC..but still need to wait [12.29pm]

4. Ok, i can see them now :) [12.47pm)

5. Briefing about my project. They want to know more and fully understand my system [01.11pm]

6. Tutorial started with checking on my localhost..seems like we cant load anything from http://localhost..mybe problem with the WampServer that has been installed before [01.32pm]

Problem troubleshooting by Mr. Amin Yuddin

7. Uninstall and reinstall WampServer on my system..but the same problem still occurred [01.37pm]

8. Problem solved! Mr. Amin (my tutor) found out that my port for localhost is clash with Skype..so, need to use http://localhost:8080 [01.43pm]

9. We try to load my application on local server.. Resolution of 1024 x 768 seems to be too big for web page. Mr. Amin advice me to resize my screen design for user friendliness purpose. User need to scroll down in my current design size in order to see the whole information provided and it is really disturbing. [02.09pm]

Mr. Amin Yuddin reviewing on my screen layout

10. Try and error - editing capture and save button [02.23pm]

11. Got prob with bitmap data. It overlay with webcam images..but will skip this problem first coz we want to focus on php for today. [02.48pm]

12. Trying to load the image using php. So, we need to integrate the php & AS script. [2.50pm]

13. Managed to create a new file with captured and save button. To load images, we use movieclip and load the images on it. [3.47pm]

14. Successfully called movie clip on stage. But still figure out on how to load the image on movie clip. [4.05pm]

15. Managed to call the image on stage using fix file name. Need to configure how to make it random/changing file name [4.26pm]

16. Managed to use PHP Get function; which is calling the image using fixed name.. But need to have test.jpg as the output of filename (value). [4.38pm]

17. Still trying on getting value of PHP Get Function. The value of Filename is undefined. Need to get it right (test.jpg has been assigned) [5.05pm]

After 7 hours spent in Starbuck KLCC :)

18. Able to create object on flash. The value now is recognizable. Now, will try to use PHP Post function; filename as variable. Flash file will be post in PHP. [7.54pm]

19. Still trying on call the image using PHP Post. The image now is able to capture and save in their variable name (file name : mtf_datetime mtf_2404111956) [8.27pm]

20. We are getting tired. Decided to dismiss today's session and continue the session next time (the date and time has not been decided yet).Thx to Mr. Amin n his GF..will keep contacting them online :) [9.13pm]

After all try and error process for nearly 10 hours, this is some collection of the image that has been save from the process. Click image to enlarge.

02.23pm to 09.13pm :)

Friday, April 15, 2011

Buying Web Hosting

I am trying to buy a web hosting now because i want to get it ready earlier - to avoid the problems later on. And this is the buying process :

[Click image to enlarge]
The advance plan that I want is already sold out :(

So, I check for another plan and found out that all the plan in this package are sold out. Because of this company is still new, so I assumed that this package is still in their plan. Later, I figured out about "Premium Web Hosting" package.

They got 2 plans in this package. So, i aim for Gold package which comes with 1GB space and 25GB bandwidth.

I'm trying to register mytweetface.com as my official website for this project. Unfortunately, the name has been taken.

So, I'm trying different name, mytweetfacemmu.com and it is available. Because of domain name is not come with this plan, i need to pay RM29 for it.

I then need to choose the billing cycle of the product. They got :
Monthly - RM7
3 Month - RM20
6 Month - RM40
1 Year - RM70
2 Years - RM130

They also provided free DNS, Email and also ID protection.

And this is my bill. But before i pay, i do consult with my friend.

My friend suggested that maybe i should buy this later. Maybe the advance plan will be available soon. Now, i just need to focus on my application and run the test on localhost. When everything is settle, then it is time for me to buy the webhosting and start to work with Facebook. So, i consider my friend's advice and decided to buy this later :)

Thursday, April 14, 2011

Scripting

I have started to seriously focus on script writing. And this is the example how i do it..

[Click image to enlarge]

I have two screen that has been joined together.

1st screen has been use to show my reference, source code and also web search.

Then i will combined the sources that i have in screen 2 with my existing code. I'm using this screen to design and do scripting.

This is the example of my 2nd page code, capturing function. :)

Wednesday, April 13, 2011

Work Station

Comfortability in work station will give a big impact in your work quality. So, to make sure i am comfortable with my station, to get the best vision/sight and details and my design, this is how my work station looks like.

[Click images to enlarge]

my workstation - laptop, monitor, keyboard, mouse, headphone and a teddy bear as my project tester :P

the connection for extended displays
:)

1 screen to browse internet, another 1 for working - designing, edit coding & etc

I am happy with this arrangement coz a big monitor helps me see the code more clearly. Other than that i can compare the display color between LCD & LED monitor. So, i can choose the best color that suite these monitors, considering that my user will use this type of monitor too.

Web Hosting

I have done few survey about hosting plans and I stucked with this 2 plan from NetKL Network and iHosterZ.. [Click image to enlarge]

i'm interested with their mySilver package.
RM60 yearly with 400MB web space and 7000MB bandwidth.

I'm interested with their Advanced Plan..RM70/year with 1000MB webspace and 10000MB bandwidth. but my friend also suggested me to sign up for basic plan, RM15 per year and RM29 for lifetime domain which make it RM44. Basic plan provide 100MB web space with 1000MB bandwidth.

So, my question here..
1. Is it 100MB space is enough for this project?
2. iHosterZ advance plan looks more interesting than NetKL Network's MySilver..but r they stable and reliable?
3. Should i just go for NetKL Network as Mr. Hafiz suggested that to me?

What do u guys think?

WampServer

Since I lost my wamp installer that i'm using during internship, I need to download it again from their website. Later, I found their latest version release (Wampserver2) and decided to download it. this is the features of Wampserver2 :

What is WampServer?
WampServer is an open source project, free to use (GPL licence). It is stands for Windows, Apache, MySQL, PHP/Perl/Phyton).
WAMP is a form of mini-server that can run on almost any Windows Operating System. WAMP includes Apache 2, PHP 5 (SMTP ports are disabled), and MySQL (phpMyAdmin and SQLitemanager are installed to manage your databases) preinstalled.

Consultation wt Mr. Hafiz Part 2 n 3

Since we finished with Crit 1 for FYP2, i'm starting to work on my final project..Due to all the problems that i have encountered, i deciding to start all my work from scratch..

After finished with my screen design, i do consulted with Mr. Hafiz on Tuesday class. He approved my design and helped me in linking my .swf files. I have problem in linking files using ActionScript 3.0 coz i'm still not used to it. Due to time limitability, we continue my consultation session on Wednesday.

I still facing the problem with linking the page. Mr. Hafiz help me to settle the problem after trying several method. We have done attempts with several method coz my "efek.swf" got some problem that unable it from linking with previous page using usual method.

Other than linking problem, I also consulted about the save and load function with him. As i was told before, i need to use online server for this project. So, Mr. Hafiz have suggest me to buy the web hosting at netkl for their cheap price and stable server. As for the test before upload it online, I will us wampserver as my database for localhost.

I am planning to finish everything with ActionScript 3.0 by this week and move on to .php and online hosting for the nextweek. I need to start to work fast as the time is really limited now.

p/s May Allah bless us and give us success :)

Monday, April 11, 2011

Effects!

After days playing with AS3.0 script for changing effects, i then have decided to choose my final effect. There are 30 effects will applied in my application. These effect will be applied on the 2nd page on my apps.

This is the effects.. (Click to enlarge)

1. Normal
2. Left mirror
3. Right mirror
4. Top mirror
5. Quad mirror
6. Ghost

7. Trail
8. Bulge
9. Fish eye
10. Fish bowl
11. Dent
12. Squeeze

13. Water
14. Fire
15. Halftone
16. Monochrome
17. Sepia
18. Rainbow

19. X-Ray
20. Warhol
21. Glow
22. Divide
23. Film Strip
24. Bottom mirror

25. Inverse mirror
26. Upside Down
27. Snow
28. Steam
29. Swarm
30. ASCII

Is it too much for applying 30 effects in my apps? What do u think?

Brand-NEW Layout!

Finally, the new layouts are done. It is more simple than my previous layout. In this layout, there are 2 or 3 pages from my previous design that has been combined into 1 page.

Lets go through my layout design page by page.. (Click on the picture to enlarge)

Page 1 : Introduction page
This page is to provide basic information/description to user about my application.

Page 2 : Snap your face
This page providing information to user about the instruction.
User may click on their image to change the effect. The image will appears in black box.
Click the red button to capture their image and re-click to re-capture.
Their image will be save in the server and load in the next page.

*On my previous design, I have different pages for T&C, instruction, capturing page and decision. I decided to combine all the elements into 1 page after considered about user-friendliness and simplicity.

Page 3 : Edit your face
User may adjust the level of the elements to edit their photo.
They also can go back to previous page if they want to recapture their photo.

Page 4 : Share your face
User may choose either to email or post on Facebook.
For email, i will using SMTP server, for Facebook, i will using Facebook apps.
User also can decide to retake their photo or exit from application without sharing.
For those who choose to email, they will proceed to next page.
For those who choose to share on Facebook, they will redirect to FB Apps. They may need to log in their account.

Page 5 : Email
User need to enter the required information and send the email.
They can go back to previous page to re-choose the method of sharing or exit without sharing.

*This application is built in Adobe Flash using ActionScript 3.0..and I think i need help in .php and also server setup..not to forget SMTP server..

I hope to hear some comments/opinion from lecturers and friends about the layout for me to improvise it. Thx in advance. =)

New Look!

After encountered problems with software and some personal problems, i ended up in stress. But to make sure everything done on time, I'm trying my best to think about the project. Because of too many things in mind, i decided to restart everything all over again and i manage to get a better idea for my project. The idea is i want to simplify the function, reduce the page count and make my apps to look more interesting. I will explain about my new ideation in the next post.

The preview of new look :

Wednesday, April 6, 2011

Path to final

After done with Crit 1, I have tried to work again with all my trials file. I'm choosing to work with the effect file first. I need to resize it and redesign the screen up to my theme. Other than that, I need to combine this file with the function of capture and save. While trying to edit the effect file for days, my Adobe software start to keep on crash and finally, they are corrupted..And now, i need to re-install my Adobe Creative Suite and continue my work.. I hope i am able to finish all the work on time. :)

Dear friends, let pray for our success =)

Friday, April 1, 2011

Layout | Screen Design

This is my final layout. To maintain the simplicity and the theme, i am using just a simple vector graphic and black/white as my theme.

So, lets go through the design :
T&C page..the content will be finalize soon..

Instruction page..Click proceed to continue..

Capturing image page..Your image will be appear in the box.
Click on the image to change the effect.
Click on red button to capture your image.

Pls leave some comment. I will try my best to improvise my layout design / works :)

Wednesday, March 30, 2011

The brightness editing

After keep Google-ing for the tutorial of making my editing page, i ended up with the tutorial on how to change the brightness of the picture.

Am trying to follow the tutorial given and this is the outcome :

Just move the slider to change the brightness
This is also ActionScript 3.0
*Sorry Cik Sal for using your photo again :P*

Creating FB apps

I have tried to experiment with the step of creating FB apps. I am using an application called "Create My Apps" which I found on Facebook. This apps is only applicable for those who want to create a simple game based on template given.

And this is the steps :
1. Click "Go To Application" to go to application page
The interface of Create My App's page.

2. Allow application to access your account
Request for permissions interface

3. Choose the category of your application - either quizzes, mini games, etc
The choices of categories

4. I have chose mini games category. So, I need to fill the information about my mini game.

The basic information form

5. If you click on search icons, it will automatically search for icons according to your application name using Google images.
The result of search

6. The application then will ask for ur permission to integrate with Facebook.
Permission to integrate

7. You need to enter Application Secret as authentication for your application.
Your application secret has been provided in the red box

8. If u have entered the wrong Application Secret, they will tell you that u have invalid OAuth 2.0 Access Token
Error Page

OAuth 2.0 is stands for open standard of authorization. It is a protocol that provides a method for making authenticated HTTP requests using a token - an identifier used to denote an access grant with specific scope, duration, and other attributes. Tokens are issued to third-party clients by an authorization server with the approval of the resource owner. OAuth defines multiple flows for obtaining a token to support a wide range of client types and user experience.

9. After you are done with authentication, you need to save the details of your application.
Check it before save

10. After you save it, your details of application will be showed. You may check it and edit it later.
Basic information

11. You need to invite your friends to use your application. You can choose to invite your friend from the list provided.
List of your friends

12. You then need to reconfirm your invitation list before sending it to your friends.
Invitation conformation

13. Your friends then will accept your request to ask them to use your application
Application request

14. They need to allow the application to access their account
Request for permission

15. After everything is done, they can start to play your game.
mini game from the templates

So, this is my first attempt of creating a Facebook apps. I will try to do a harder one later. I have visited http://developers.facebook.com and found out that they are providing Facebook PHP SDK in order to help the developer to develop their own apps.

p/s i already download the SDK and now in process of understanding on how to use it :)

Save and Load

I am trying to make the image captured to be able to save n load for editing. It will somehow looks like this.

So, after trying few tutorial on net, i am able to save the picture. To load it back, i might need web server. I think Apache web server will be appropriate to solve this problem.

And this is the example of what I have tried to do..

the screen capture of my trial..
left : live cam
right : saved image

the saved image will be save in index.php..in order to make it working properly, i need to install the server.

Tuesday, March 29, 2011

Adding Effect

By using ActionScript 3.0, i might be able to add effect on the webcam as the effect of Mac's photobooth. The example of the effect are available here.

This is the example on how i will creating effect on my project..
Step 1 :
Create an .fla file

Step 2 :
Create an ActionSript file, rename as same as .fla file. In the script area, copy this script.

basic/root scripting

Step 3 :
creating the ActionScript file for media, webcam and the effects.

Step 4 :
Run your application

Example of mine


Storyboard

Due to some changes in my idea, i have done a new storyboard to describe the detailed flow of my project.

*The idea have been changed due to technical disability.

And this is my new finalized storyboard

1. User will enter interactive area to interact with the application.

2. User then can activate the program by clicking on "ENTER" button.
*This intro page will provide title, basic description, and also title to the user.
3. User then will be directed to instruction page. After done and understand the instruction, user may proceed to the next page.

4. Terms and condition are applied in order to keep this application on the right track. User need to agree with T&C in order to proceed to the next page.

5. User can click on their image to change the effect. The effect available is mirror, squeeze, fish eye and so on. If user like the effect applied, they can click on "SNAP" button.

6. The image taken will be shown on the screen. User will be asked either they like the picture or not.
*If yes, proceed to next page
*If no, back to previous page

7. User then can edit their pictures with features provided :
*brightness, saturation, contrast, color
*rotate, move, resize

8. When done with editing, they may choose either want to download the pictures via email or upload it on Facebook.

9. If the user choose to email it, they just need to provide the recipient's email address and a message to them. The email will be sent by MyTweetFace email.

10. If the user chose to upload their image on Facebook, they need to login on their account first.

11. They will be directed to MyTweetFace Facebook Application. The apps will first asked their permission to access their profile.

12. The photo then will be upload upon the permission granted by user.